Store-bought sprinkles do the job… but they’re rarely exciting. They fade in color, taste vaguely of sugar dust, and never quite match the mood you’re going for. Making your own is surprisingly easy — and the payoff is big. Crisp, colorful, and completely customizable, DIY sprinkles let you match your dessert’s vibe exactly, from pastel confetti for a baby shower to metallic flecks for a New Year’s toast.
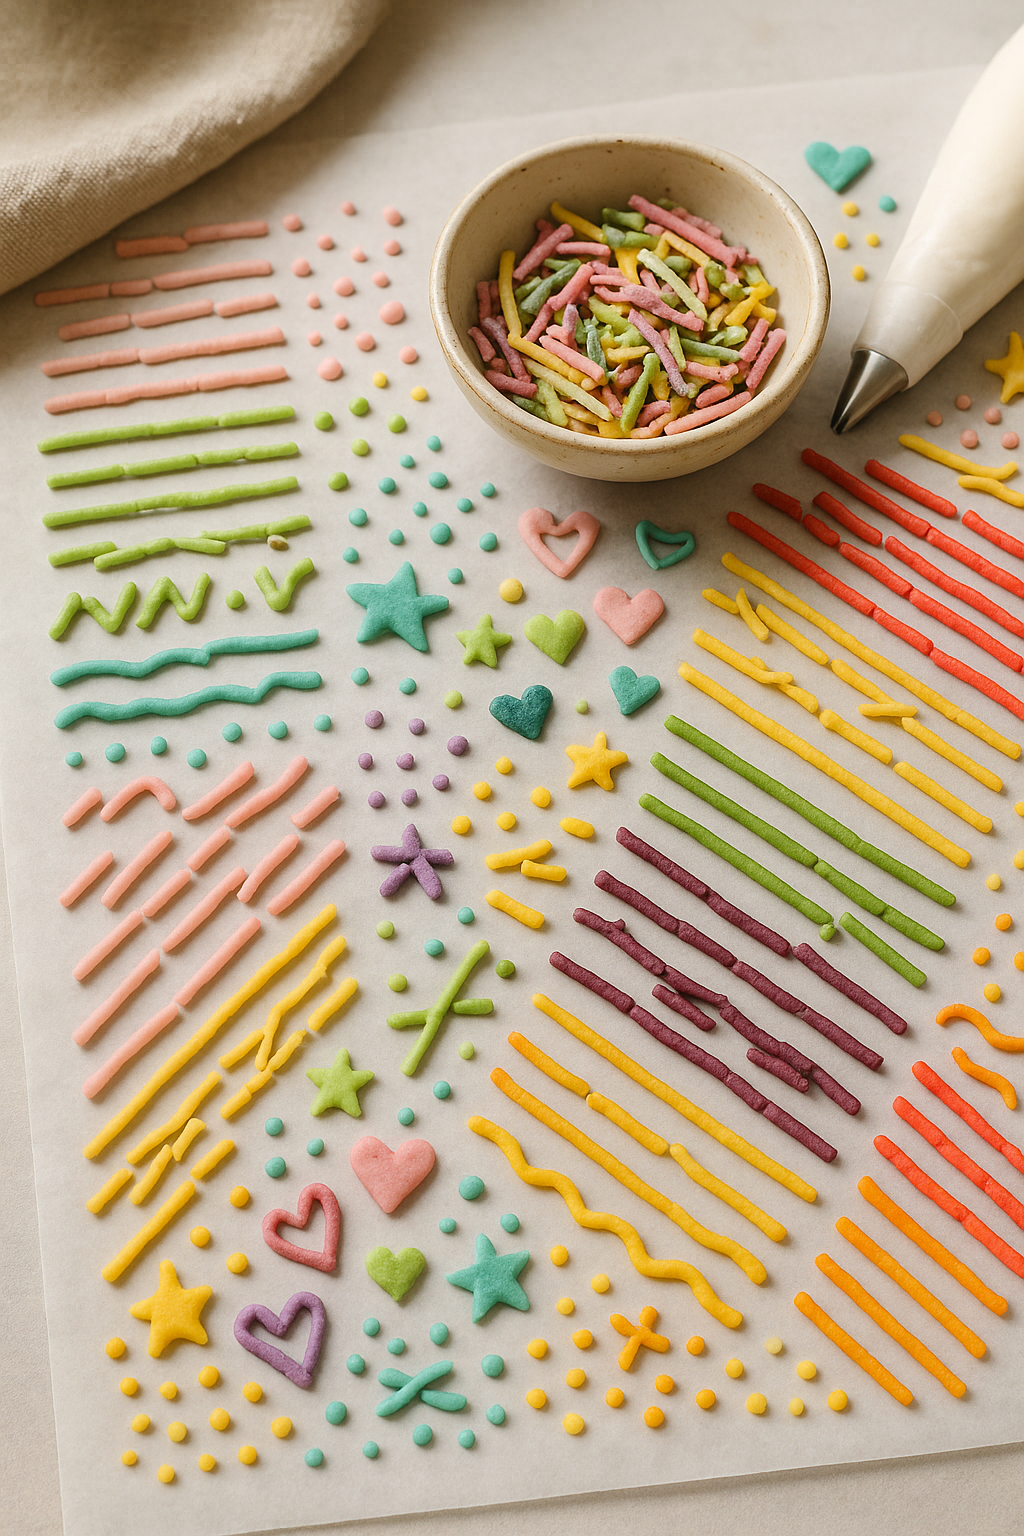
The best part? You’re not limited to the classic sprinkle shape. Once you’ve made your icing “dough,” you can pipe long strands for classic jimmies, tiny dots for nonpareil-style sprinkles, zigzags, hearts, or even letters. This is edible confetti on your terms.
Why Make Your Own Sprinkles
- Flavor control — Infuse vanilla, almond, lemon, or peppermint into your icing base for sprinkles that actually taste like something.
- Color freedom — Use bold gel dyes, or keep it natural with beet powder, turmeric, matcha, spirulina, or crushed freeze-dried fruit for softer, earthy hues.
- Custom shapes — Beyond straight lines, try swirls, mini stars, or polka dots to match the dessert or event theme.
- Shelf life — A well-sealed jar of homemade sprinkles will last up to a month, ready to sprinkle over cakes, cookies, donuts, cocktails, and even ice cream.
Tips for Sprinkle Success
- Pipe on parchment, not wax paper — They’ll release more easily once dry.
- Aim for uniform thickness — Thin enough to dry, but thick enough to hold shape when broken.
- Give them time — Sprinkles must be completely dry before breaking, or they’ll crumble into powder.
- Think beyond desserts — Use metallic sprinkles for rimming glasses, rainbow dots for funfetti pancakes, or pastel stars for a toddler’s birthday cake.
Making sprinkles might feel like a “someday” kitchen project, but once you do it once, you’ll never look at the dusty supermarket jar the same way again. It’s low-effort, high-reward kitchen magic — and it makes you look like the kind of person who just has matching sprinkles on hand.
DIY Sprinkles
Ingredients
- 1 ½ cups powdered sugar
- 2 tbsp water plus more as needed
- 1 tbsp light corn syrup or golden syrup
- ½ tsp vanilla extract or almond extract for bakery vibes
- Gel food coloring assorted
- Pinch of fine salt
Instructions
- In a medium bowl, whisk together powdered sugar, water, corn syrup, vanilla, and salt until smooth and thick but pipeable.
- Divide icing into small bowls and tint each with gel food coloring.
- Transfer each color to a piping bag fitted with a small round tip (or a zip-top bag with a tiny corner snipped).
- Pipe long, thin lines of icing onto a parchment-lined baking sheet.
- Let dry, uncovered, at room temperature until completely firm — 12 hours minimum, ideally overnight.
- Once dry, break lines into sprinkle-sized pieces using clean hands or a bench scraper.
- Store in an airtight container at room temperature for up to 1 month.
Notes
• Shortcuts: If you’re impatient, dry in the oven with the light on (no heat) for a few hours.
• Toddler tip: Let kids “paint” the icing stripes with a clean paintbrush for galaxy or ombre effects.
• Apéro energy: Use black, gold, or metallic luster dust for chic cocktail glass rimming.